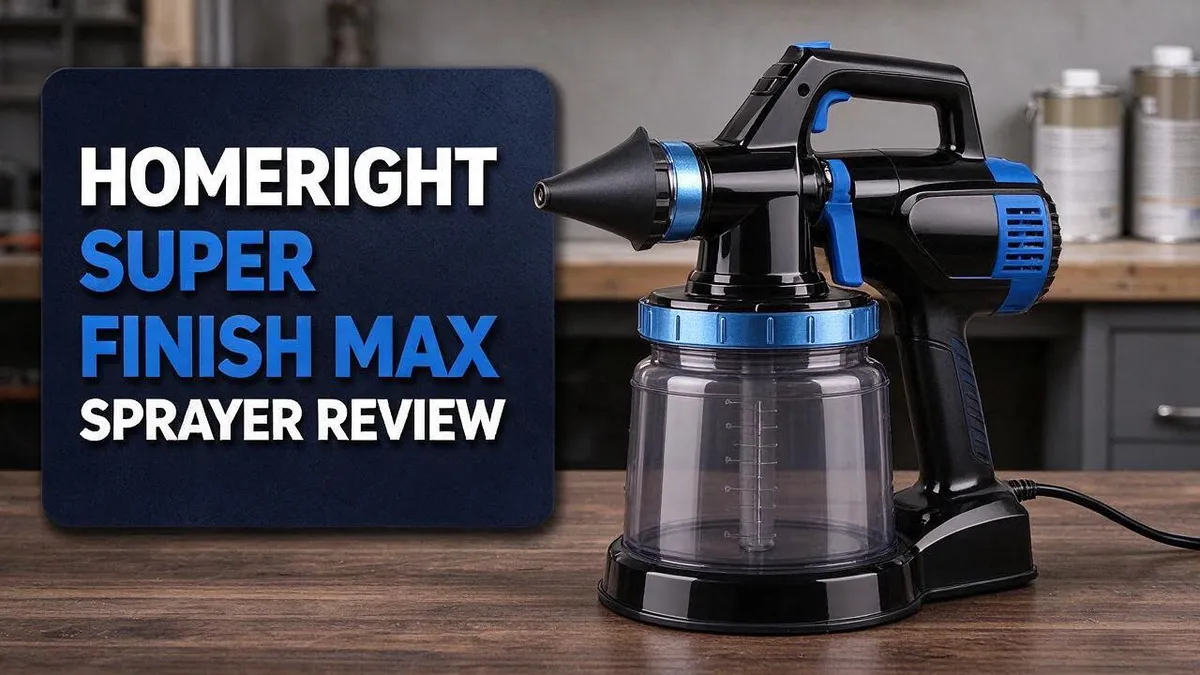
HomeRight Super Finish Max Sprayer Review: Is This Worth It?
Painting furniture can feel slow and messy. A good sprayer changes that fast. The HomeRight Super Finish Max Sprayer promises a smoother finish with less effort.
Looking for an easy way to paint cabinets, trim, or fences? This handheld tool may be the answer you need.
It runs on electricity, so you do not need an air compressor. It comes with three brass tips and three spray patterns. You can switch between horizontal, vertical, and round patterns with ease.
Most users find it easy for beginners. It handles stains, sealers, latex, chalk paint, and milk paint. Cleanup takes about 10 to 15 minutes, which saves your weekend.
Keep reading to see how it performs, where it shines, and where it falls short.
In a Nutshell
-
Quick cleanup saves time: Cleanup usually takes about 10 to 15 minutes. You spend less time washing up and more time enjoying your finished project.
-
Big jobs go faster: It covers large areas with a single coat. Fewer passes mean your fences and walls get finished sooner.
-
Thick paints spray smoothly: It sprays heavier paints with less thinning. You skip the extra mixing step and start painting right away.
-
Flexible spray patterns: Horizontal, vertical, and round patterns fit different surfaces. You can change the pattern to match each part of your project.
-
Watch for thin finishes: One forum user said it struggled to atomize thinner finishes often sprayed on furniture. Test a small area before you start your main project.
-
Real user comparison: One owner compared it with a Wagner sprayer they already own. Their feedback gives you a helpful point of reference when you compare options.
Spray Patterns and Coverage

- Life changing paint sprayer: this paint sprayer requires less thinning compared to finish max or...
- Easy to use for eager Painters: fast and easy setup, multiple spray settings and quick cleaning make...

Last update on 2026-10-21 / Affiliate links / Images from Amazon Product Advertising API Some of the links on this website are affiliate links, which means that at no additional cost to you, I earn a commission if you click through and make a purchase. I only recommend products and services that I believe will add value to my readers. Thank you for your support!
Spray patterns decide how paint lands on your project. The HomeRight Super Finish Max Sprayer offers three options. Each one suits a different shape.
Use the horizontal pattern for wide, flat surfaces. Tabletops, cabinet doors, and wall sections work well with this setting. It lays down a wide band of finish, so you move across the piece in smooth passes.
Choose the vertical pattern for tall, narrow pieces. Table legs, chair spindles, and trim boards fit this setting. The tall band helps you coat narrow parts without wasting paint.
Switch to the round pattern for detail work. Corners, grooves, and small brackets need a focused spray. This setting places paint in a tighter spot.
Plan your passes before you start. Mark the surface into sections. Work one section at a time so the paint stays wet along the edges.
Coverage depends on distance and speed as much as the pattern. Hold the tip at the same distance from the surface each time. Keep your arm moving at a steady pace.
Large walls and fences reward a steady rhythm. Long, even strokes cover more ground with fewer missed spots. Short, jerky movements leave uneven coats.
Overlap each pass by about half. This simple habit helps prevent stripes. It also gives a more even finish across large areas.
Test every setting on cardboard first. Scrap wood works too. Adjust the material flow knob until the spray looks right.
Check your coverage in good light. Shine a flashlight across the surface at an angle. This shows thin spots before the paint dries.
Start with a light coat. Add a second coat once the first one dries. Thin layers usually look smoother than one heavy pass.
Clean the tip between sections. A clean tip keeps the pattern sharp. It also stops buildup from changing your coverage during the project.
Paint Compatibility and Thickness
Start with a small test board. Spray a scrap piece of wood or cardboard before you touch your project. This quick check shows how the paint lands and whether the coverage looks right.
Stir your paint well before you pour it. Strain it through a fine mesh filter to remove lumps. Clumps can clog the brass tips and cause uneven spray.
Adjust the material flow knob slowly. Start low and turn it up until the paint sprays evenly. Small changes make a big difference with thicker finishes.
Thin paints need a different approach. If your finish sprays unevenly, add a small amount of the recommended thinner. Mix it well, then test again on your scrap board.
Check the sheen, too. Glossy finishes often flow differently than matte ones. Test each sheen before you commit to a full piece.
Try a few paint brands as well. Each product has its own mix, so results can vary. A quick spray test helps you spot clumps, runs, or spotty coverage early.
Watch the drying time. Heavier coats take longer to cure, so give them room to dry. Rushing a second coat can cause drips and tacky spots.
Plan for a second coat. Light misting builds color gradually. Two thin layers often look smoother than one heavy layer, especially on furniture.
Prime porous surfaces first. Bare wood soaks up more paint than primed or sealed wood. A primer helps the finish lay down evenly and keeps the color consistent.
Keep the cup clean between colors. Leftover residue can change the color and affect how the paint flows. Wipe the cup and tips whenever you switch products.
Write down your settings. Note the knob position and pattern for each paint you use. This record saves time on future projects and helps you repeat good results.
Setup and Ease of Use
Getting started with the HomeRight Super Finish Max feels simple. Most users find it easy to pick up, even with little experience.
There is no hose or tank to manage. The sprayer runs on electric power alone, so you skip the air compressor entirely.
Plug the unit into a standard outlet before you begin. Keep the cord out of your path so you can move freely.
Changing tips takes very little effort. Store the three brass tips in a dry spot so they stay ready for your next project.
Your first session is a learning session. Expect a short adjustment period while your hand gets used to the sprayer’s feel.
Move your whole arm instead of just your wrist. Moving only your wrist can cause uneven lines and sore muscles.
Protect your eyes and lungs first. Wear a dust mask and safety glasses before you spray.
Cover the floor and nearby items with drop cloths. Good prep keeps overspray off surfaces you do not want to paint.
Gather rags, painter’s tape, and sandpaper before you begin. Having tools within reach keeps your workflow smooth.
Work in a room with good airflow. Open a window or place a fan nearby, because fresh air helps finishes dry evenly.
Check the power switch and trigger before each job. A quick run with no paint lets you hear the motor and feel the grip.
Keep your stance balanced. Adjust your feet so your body stays steady, since balanced posture reduces fatigue on large jobs.
A simple routine builds confidence. Start each session the same way every time. Repeated steps help you get consistent results.
Your early projects may feel slow. Your later projects usually move faster. Practice turns this sprayer into a reliable helper.
Top 3 Alternatives
Wagner Flexio 590

- HIGH-PERFORMANCE HVLP PAINT SPRAYER – The Wagner FLEXiO 5000 HVLP Paint and Stain Sprayer delivers...
- SPRAY UNTHINNED PAINTS & STAINS – Powerful X-Boost turbine sprays most unthinned latex and...
Last update on 2026-10-21 / Affiliate links / Images from Amazon Product Advertising API Some of the links on this website are affiliate links, which means that at no additional cost to you, I earn a commission if you click through and make a purchase. I only recommend products and services that I believe will add value to my readers. Thank you for your support!
Want a lightweight sprayer for smaller jobs? The Wagner Flexio 590 may suit you. It works well on trim, doors, and furniture.
It has a flexible hose and a simple trigger. You can switch between thin stains and thicker paints with ease.
Graco TrueCoat 360

- Perfect for DIYers looking for a fast and easy alternative to brushes and rollers to quickly...
- Ideal for projects up to 2 gallons in size, allowing you tackle a range of projects every year
Last update on 2026-10-26 / Affiliate links / Images from Amazon Product Advertising API Some of the links on this website are affiliate links, which means that at no additional cost to you, I earn a commission if you click through and make a purchase. I only recommend products and services that I believe will add value to my readers. Thank you for your support!
Need to cover big walls fast? The Graco TrueCoat 360 can help. It uses a handheld, hose-free design.
Moving around a room feels simple. Many people like its steady flow for ceilings and open spaces.
Wagner Control Spray Max

- HVLP PAINT SPRAYER: The Control Spray Max paint sprayer uses high volume, low pressure technology to...
- USE WITH A WIDE VARIETY OF MATERIALS: Powerful two-stage turbine makes it easy to paint walls and...
Last update on 2026-10-26 / Affiliate links / Images from Amazon Product Advertising API Some of the links on this website are affiliate links, which means that at no additional cost to you, I earn a commission if you click through and make a purchase. I only recommend products and services that I believe will add value to my readers. Thank you for your support!
Prefer precise control? The Wagner Control Spray Max gives you that. Its adjustable settings help you get a clean, even coat.
Use it for cabinets, shutters, and fine details. You can expect less overspray when you dial in the right settings.
Cleanup and Maintenance
Cleanup decides how long your sprayer lasts. Most users finish cleaning in about 10 to 15 minutes. Paint dries fast inside the cup and lines, so start right after you finish spraying.
Empty any leftover paint back into its original can. Pour out the extra first. Then move on to rinsing.
Rinse the cup and tips with the cleaner that matches your paint. Water works for latex and chalk paint. Oil based finishes need the solvent listed on the paint label.
Run clean fluid through the sprayer until the spray runs clear.
Keep the material flow knob open during this step. Fluid then moves through every part.
Remove the three brass tips and soak them separately.
Use a soft brush to clear dried paint from small openings. Avoid wire or metal pins. They scratch the brass and change the spray pattern.
Check the lid for drips before you close it. Paint often hides under the rim.
Wipe the outside of the motor housing and handle with a damp cloth. Keep liquid away from the electrical parts. Dry every piece fully before you store the sprayer.
Check the tips during each cleaning session. Replace a tip if the spray looks uneven or stays blocked. Good care keeps your finish smooth and your results consistent.
Store the sprayer in a dry place with the cup empty. Wrap the cord loosely so it does not kink. Cover the unit to keep dust out of the nozzle and tips.
A few minutes of cleaning now saves time on your next project. Dried paint is much harder to remove later. Make cleaning a habit every time you finish.
Finish Quality on Furniture and Trim
Furniture shows every flaw. Dips, drips, and rough patches stand out fast. A smooth coat makes a dresser look factory made.
The HomeRight Super Finish Max handles thicker paints well. It sprays heavier materials with less thinning. That helps cover wood grain in fewer passes.
Thicker finishes can hide small imperfections. A single coat covers large flat panels quickly. Cabinet doors and tabletops benefit most from this speed.
Brushed finishes often leave visible strokes. The sprayer creates a more even film across flat panels. Many people notice this difference right away on a table top.
Thin finishes are the weak spot. One forum user reported that the sprayer does not atomize thinner finishes often used on furniture. Expect a rougher result with those products.
Trim work asks for a different kind of control, so slow down. Thin edges and corners need careful aim. A narrow spray pattern follows the profile of a baseboard or door casing.
Distance matters on finished surfaces. Holding the tip too close creates heavy spots. Holding it too far leaves a dusty texture. Keep the distance steady across the whole piece.
Panel work also rewards a steady hand. Move the sprayer in long, even strokes across each door. Overlap each pass slightly to avoid light stripes.
Glossy surfaces show every bump. Light sanding between coats can smooth small flaws. It takes extra time, but the result looks worth it.
Dust is your biggest enemy. It settles on wet paint quickly in a workshop. Spray in a clean, still room away from fans and open windows.
Plan your finish order too. Start with the back and inside surfaces. Save the front faces for last so they stay clean.
Finish quality grows from small wins, and each clean coat builds on the last one. Step back and check the surface in good light before you move on.
Pros and Cons
Pros
- Handles stains, sealers, latex, and chalk paint.
- Works on fences and walls, not just furniture.
- Needs no air compressor to get started.
- Three spray patterns suit flat, upright, and round surfaces.
- The material flow knob lets you adjust output.
Cons
- Overspray can drift onto nearby windows and light fixtures.
- Experiences vary, so test on scrap wood first.
- Direct comparisons with other sprayers are limited.
- Results depend on how you set the material flow knob.
Who Should Buy It
If you are new to painting, this sprayer could be a good fit. Many users say it feels easy to learn. You do not need years of experience to get clean, even results.
Homeowners with a long to-do list will likely enjoy it most. Think about kitchen cabinets, interior doors, or a backyard fence. The sprayer covers large surfaces quickly, so your weekend plans stay on track.
Weekend DIYers who want a smooth look can also benefit. Thicker paints spray with less thinning, which saves time at the mixing bucket. That makes it handy for latex and chalk paint projects around the house.
Hobbyists who work with milk paint or stain may appreciate the range. The sprayer handles several finish types, so you can use one tool for many different projects. That flexibility keeps your workshop simple.
Some buyers should look elsewhere. If your main goal is spraying very thin finishes on fine furniture, read reviews first. One forum member reported trouble with that type of finish.
Professional painters who need a sprayer for daily commercial work may want a larger machine. Heavy use calls for a tool built for long shifts. Light to moderate projects fit this sprayer much better.
Think about your project size and paint type before you decide. Ask yourself whether you want fast coverage on panels, fences, and walls. If the answer is yes, this sprayer deserves a close look.
Your skill level matters too. Beginners can practice on scrap boards and build confidence over a few sessions. Experienced painters may want more control for detailed work, so plan extra time for practice.
In short, this sprayer suits beginners, homeowners, and hobby crafters who value speed. It may not suit people chasing flawless results on thin finishes. Match your projects to these goals, and you will know if it fits.
Final Verdict
Our final take focuses on time and effort. Many people want a good looking finish without losing a whole weekend to the job.
The biggest win is saved time. Cleanup takes about 10 to 15 minutes. That leaves more hours for the fun part, which is seeing the project come together.
This sprayer also works well when your projects change. You can move from a dresser to a fence in one afternoon.
The learning curve is short, but it is real. Most users find it easy to start. Still, the first few passes teach you more than any guide can.
Good lighting makes a big difference too. Work in bright light so you can spot thin spots and missed areas while the coat is still wet. Fixing them early saves time later.
Think about the surfaces you paint most. If thick paints and large flat panels fill your list, this sprayer can earn its spot in your workspace.
Thin finishes need a closer look. If delicate coats on fine furniture matter most, run a sample board first. Judge the result yourself before you start the full project.
Daily commercial painters should compare larger machines. Their workload may demand more capacity than a handheld unit can offer.
Overall, the HomeRight Super Finish Max gives you a flexible tool without a complicated setup. It helps you finish more projects in less time.
Take your time choosing, and match the sprayer to your real projects. A good fit means fewer surprises and more pride in the finished piece.
Bottom line: this sprayer makes a smooth, fast finish easier to reach. It rewards careful setup, steady hands, and a clean workspace. Pick it for speed and range, and you will likely be happy with the results.
Frequently Asked Questions
Can I spray thin stain on furniture with this sprayer?
Start with the stain as sold. One forum user found that it may not atomize thinner finishes, so test a small patch on scrap wood first. If the spray looks rough, try a light thinning step and retest.
Do I need a second coat?
Many projects look finished after one coat, especially with paints that cover well. Dark colors over light surfaces often need a second pass. Let the first coat dry fully before you decide.
Can I use it indoors?
Yes, but ventilation matters. Open windows and run a fan to move fumes out of the room. Keep kids and pets away from the work area while you spray.
Which tip should I choose?
Match the tip to the paint’s thickness. Thicker paints like latex or chalk paint often suit one tip, while thinner stains may suit another. Check the manual for the best pairing, then run a quick test before you start the full project.
How should I store the sprayer between jobs?
Clean the sprayer fully and dry every part before storage. Keep it in a dry spot away from direct sunlight. This helps the parts last longer and keeps the next project on schedule.

Hi, I’m Amelia Thornton, the founder of ElectroPro.blog.
I write about smart devices, gadgets, electronics, and tech essentials from Amazon.
My goal is to help you discover reliable and innovative tech that truly makes life easier.
From home automation to everyday gear, I test and share what’s worth your investment.
Join me as I explore the smartest tech trends—one gadget at a time.